

推拉球杆
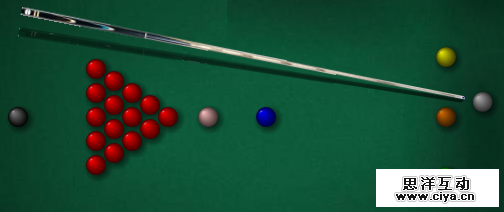
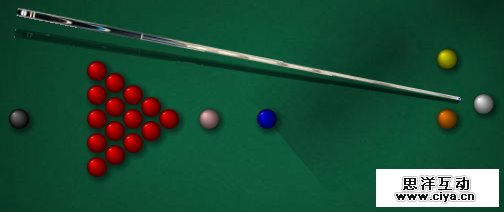
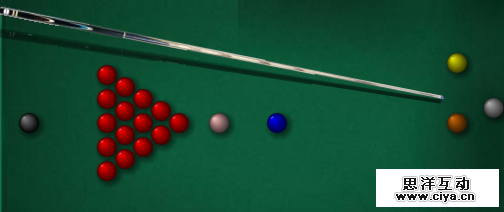
这个球杆动画模仿了真实人类的特征:你是否看到过斯诺克选手在瞄准的时候会推拉球杆?我们通过HTML5改变母球和球杆的距离实现了这一效果。当达到一个极点是球杆会被拉回来,然后到达另一个极点时又会被向前推。这样周而复始,知道选手停止移动鼠标。
广州网站建设,网站建设,广州网页设计,广州网站设计
- var cueDistance = 0;
- var cuePulling = true;
- .
- .
- .
- function render() {
- .
- .
- .
- if (cuePulling) {
- if (lastMouseX == mouseX ||
- lastMouseY == mouseY) {
- cueDistance += 1;
- }
- else {
- cuePulling = false;
- getMouseXY();
- }
- }
- else {
- cueDistance -= 1;
- }
- if (cueDistance > 40) {
- cueDistance = 40;
- cuePulling = false;
- }
- else if (cueDistance < 0) {
- cueDistance = 0;
- cuePulling = true;
- }
- .
- .
- .
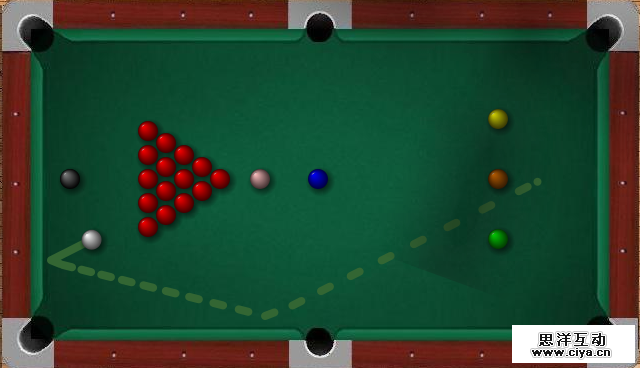
显示目标路径
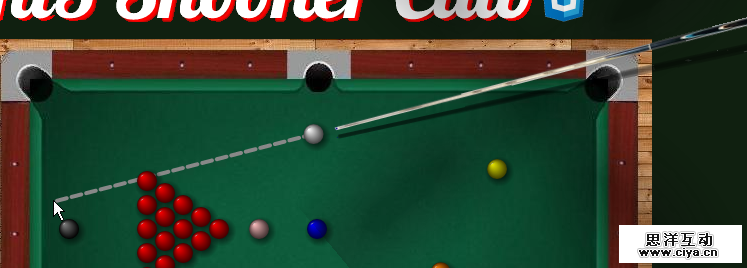
当选手移动鼠标时,我们会在母球和当前鼠标点之间画一条虚线。这对选手们长距离瞄准相当的便利。
这条目标路径只有在等待用户击球时才会显示:
- if (!cueBall.pocketIndex) {
- context.strokeStyle = '#888';
- context.lineWidth = 4;
- context.lineCap = 'round';
- context.beginPath();
- //here we draw the line
- context.dashedLine(cueBall.position.x, cueBall.position.y, targetX, targetY);
- context.closePath();
- context.stroke();
- }
需要注意的是在HTML5 canvas中并没有内置函数来画虚线。幸运的是有一个叫phrogz的家伙在StackOverflow网站上发布了一个关于这个画虚线的帖子:
- //function kindly provided by phrogz at:
- //http://stackoverflow.com/questions/4576724/dotted-stroke-in-canvas
- var CP = window.CanvasRenderingContext2D && CanvasRenderingContext2D.prototype;
- if (CP && CP.lineTo) {
- CP.dashedLine = function (x, y, x2, y2, dashArray) {
- if (!dashArray) dashArray = [10, 5];
- var dashCount = dashArray.length;
- this.moveTo(x, y);
- var dx = (x2 - x), dy = (y2 - y);
- var slope = dy / dx;
- var distRemaining = Math.sqrt(dx * dx + dy * dy);
- var dashIndex = 0, draw = true;
- while (distRemaining >= 0.1) {
- var dashLength = dashArray[dashIndex++ % dashCount];
- if (dashLength > distRemaining) dashLength = distRemaining;
- var xStep = Math.sqrt(dashLength * dashLength / (1 + slope * slope));
- var signal = (x2 > x ? 1 : -1);
- x += xStep * signal;
- y += slope * xStep * signal;
- this[draw ? 'lineTo' : 'moveTo'](x, y);
- distRemaining -= dashLength;
- draw = !draw;
- }
- }
- }
显示跟踪路径
当选手击打母球后,母球会在球桌上留下一条跟踪线,用来标明其上一个点的位置。
创建这个跟踪路径比前面提到的目标路径复杂一点。首先我必须去实例化一个Queue对象,这个项目中的Queue对象原型由Stephen Morley提供。
- var tracingQueue = new Queue();
一旦球开始运动,我们就将母球的实时位置压入这个Queue中:
- if (renderStep % 2 == 0) {
- draw();
- enqueuePosition(new Vector2D(cueBall.position.x, cueBall.position.y));
- }
enqueuePosition函数确保了我们只保存前20个点的位置,这也就是为什么我们只让显示最近的母球的运动路径的原因。
- function enqueuePosition(position) {
- tracingQueue.enqueue(position);
- var len = tracingQueue.getLength();
- if (len > 20) {
- tracingQueue.dequeue();
- }
- }
接下来,我们要遍历Queue中的数据,从而来创建这条跟踪路径:
- //drawing the tracing line
- var lastPosX = cueBall.position.x;
- var lastPosY = cueBall.position.y;
- var arr = tracingQueue.getArray();
- if (!cueBall.pocketIndex) {
- context.strokeStyle = '#363';
- context.lineWidth = 8;
- context.lineCap = 'round';
- context.beginPath();
- var i = arr.length;
- while (--i > -1) {
- var posX = arr[i].x;
- var posY = arr[i].y;
- context.dashedLine(lastPosX, lastPosY, posX, posY, [10,200,10,20]);
- lastPosX = posX;
- lastPosY = posY;
- }
- context.closePath();
- context.stroke();
- }
绘制小球
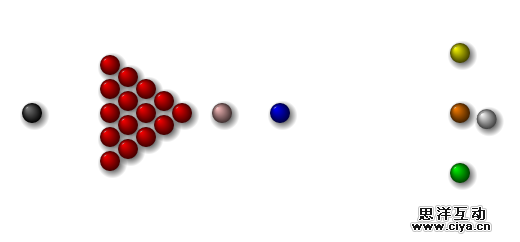
小球和他们的投影都是呈现在一个特殊的canvas上(在球杆canvas下方)。
在呈现小球时,我们先要呈现其投影,这样做主要是为了模拟3D的环境。每一个小球必须有投影,我们对每个小球的投影位置都会有一点细微的不同,这些细微差别表明了小球是在不同方向被投射的,也说明了光源所在的位置。
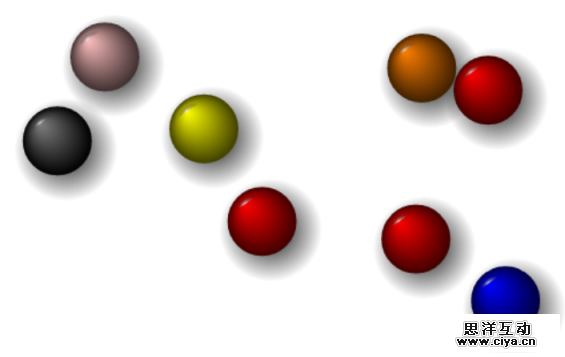
每个小球是由一个公共函数来画的,函数有两个参数:1)canvas context;2)小球对象。函数先画出一个完整的圆弧然后根据小球对象提供的颜色将这个圆弧线性填充。
每一个小球对象有3中颜色:光亮色、中色和暗色,这些颜色就是用来创建线性渐变颜色的,3D效果也是这样做出来的。
- function drawBall(context, ball, newPosition, newSize) {
- var position = ball.position;
- var size = ball.size;
- if (newPosition != null)
- position = newPosition;
- if (newSize != null)
- size = newSize;
- //main circle
- context.beginPath();
- context.fillStyle = ball.color;
- context.arc(position.x, position.y, size, 0, Math.PI * 2, true);
- var gradient = context.createRadialGradient(
- position.x - size / 2, position.y - size / 2, 0, position.x,
- position.y, size );
- //bright spot
- gradient.addColorStop(0, ball.color);
- gradient.addColorStop(1, ball.darkColor);
- context.fillStyle = gradient;
- context.fill();
- context.closePath();
- context.beginPath();
- context.arc(position.x, position.y, size * 0.85, (Math.PI / 180) * 270,
- (Math.PI / 180) * 200, true);
- context.lineTo(ball.x, ball.y);
- var gradient = context.createRadialGradient(
- position.x - size * .5, position.y - size * .5,
- 0, position.x, position.y, size);
- gradient.addColorStop(0, ball.lightColor);
- gradient.addColorStop(0.5, 'transparent');
- context.fillStyle = gradient;
- context.fill();
- }
- function drawBallShadow(context, ball) {
- //main circle
- context.beginPath();
- context.arc(ball.position.x + ball.size * .25, ball.position.y + ball.size * .25,
- ball.size * 2, 0, Math.PI * 2, true);
- try {
- var gradient = context.createRadialGradient(
- ball.position.x + ball.size * .25, ball.position.y + ball.size * .25,
- 0, ball.position.x + ball.size * .25, ball.position.y + ball.size * .25,
- ball.size * 1.5 );
- }
- catch (err) {
- alert(err);
- alert(ball.position.x + ',' + ball.position.y);
- }
- gradient.addColorStop(0, '#000000');
- gradient.addColorStop(1, 'transparent');
- context.fillStyle = gradient;
- context.fill();
- context.closePath();
- }
检测小球之间的碰撞
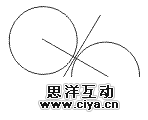
小球以快速和连续的方式呈现在canvas上:首先,我们清空canvas,然后在上面绘制投影,再绘制小球,最后更新小球的位置坐标,这样周而复始。在这个期间,我们需要检查小球是否与另一个小球发生了碰撞,我们通过对小球的碰撞检测来完成这些的。
- function isColliding(ball1, ball2) {
- if (ball1.pocketIndex == null && ball2.pocketIndex == null) {
- var xd = (ball1.position.x - ball2.position.x);
- var yd = (ball1.position.y - ball2.position.y);
- var sumRadius = ball1.size + ball2.size;
- var sqrRadius = sumRadius * sumRadius;
- var distSqr = (xd * xd) + (yd * yd);
- if (Math.round(distSqr) <= Math.round(sqrRadius)) {
- if (ball1.Points == 0) {
- strokenBalls[strokenBalls.length] = ball2;
- }
- else if (ball2.Points == 0) {
- strokenBalls[strokenBalls.length] = ball1;
- }
- return true;
- }
- }
- return false;
- }
